Friday 26 July 2024

Dolly Dimples' Theodore

Hi everyone, today I'm sharing a step by step guide to creating this art journal page using Dolly Dimples papers and stamps.
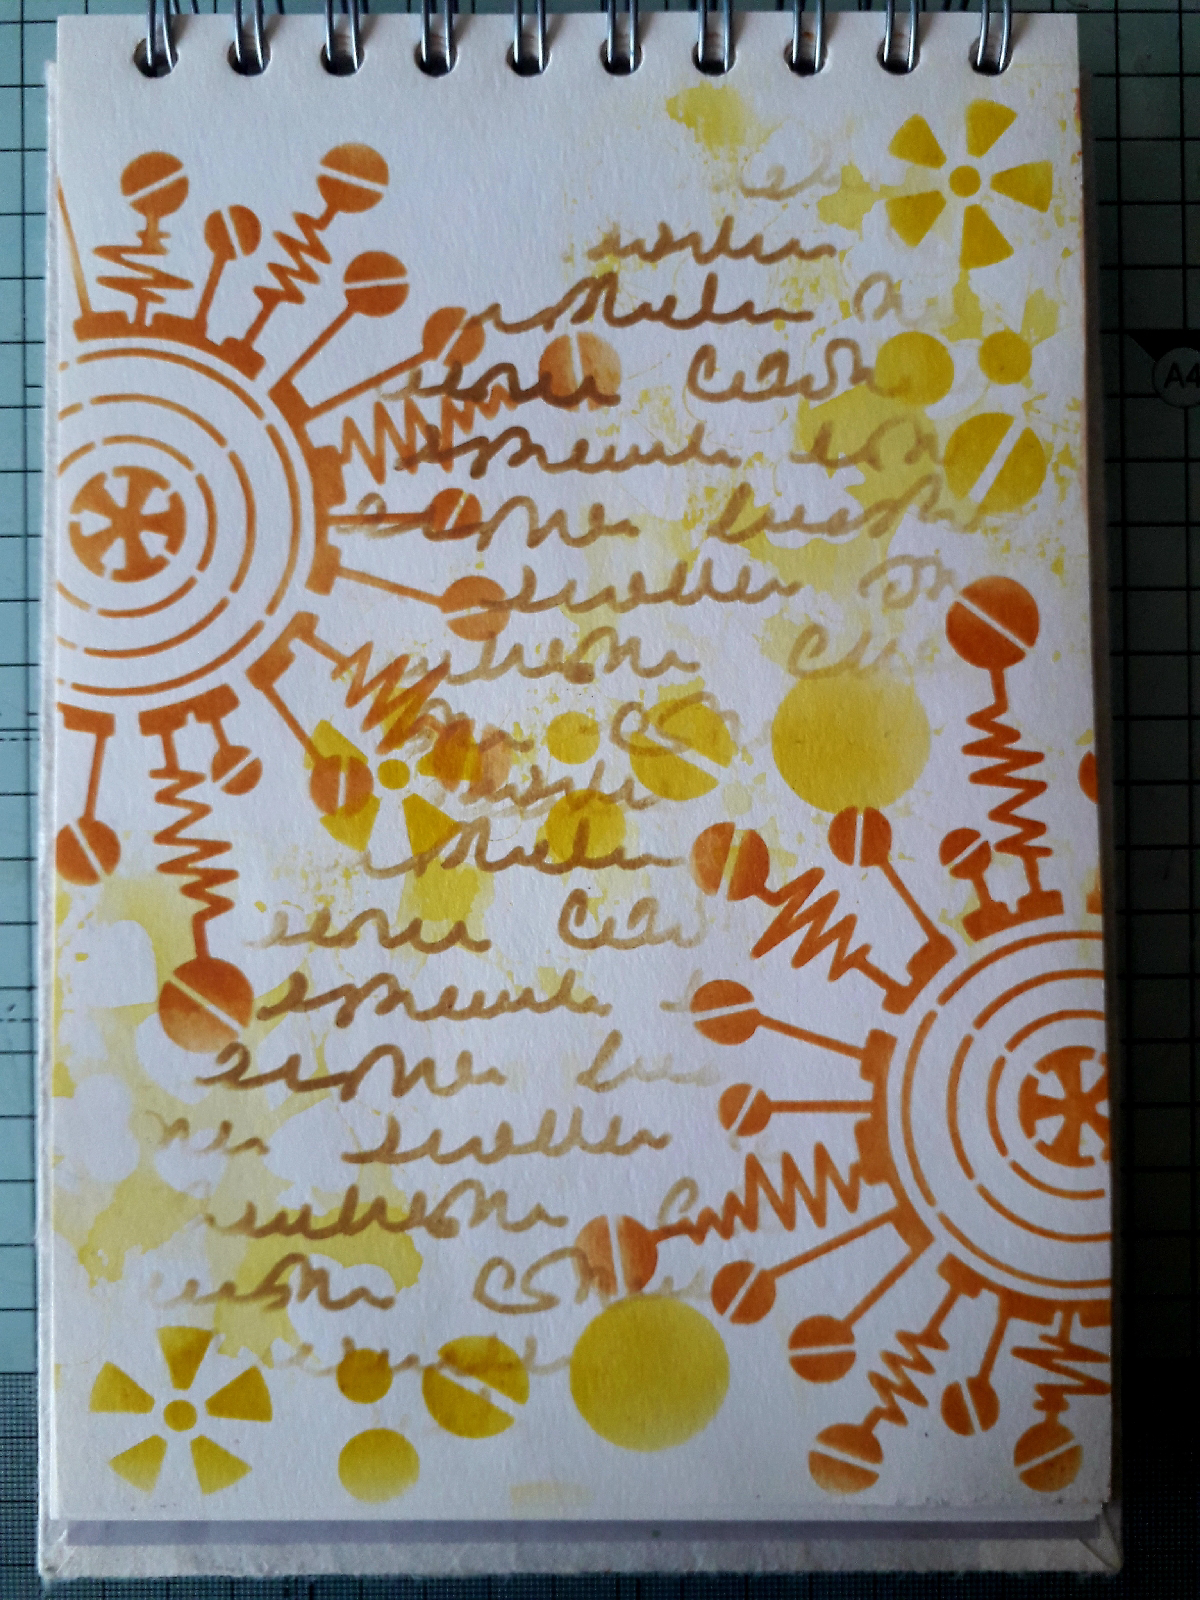
To begin I tore one of the papers from the Dolly Dimples Vintage Lace Paper Kit, so that it fit my 4 x 4 inch Pink Pig art journal leaving a white border. I then glued it to the page.
Next I stamped one of the borders from the Dolly Tots Accessories 2 stamp set using Versafine Clair nocturne ink. 
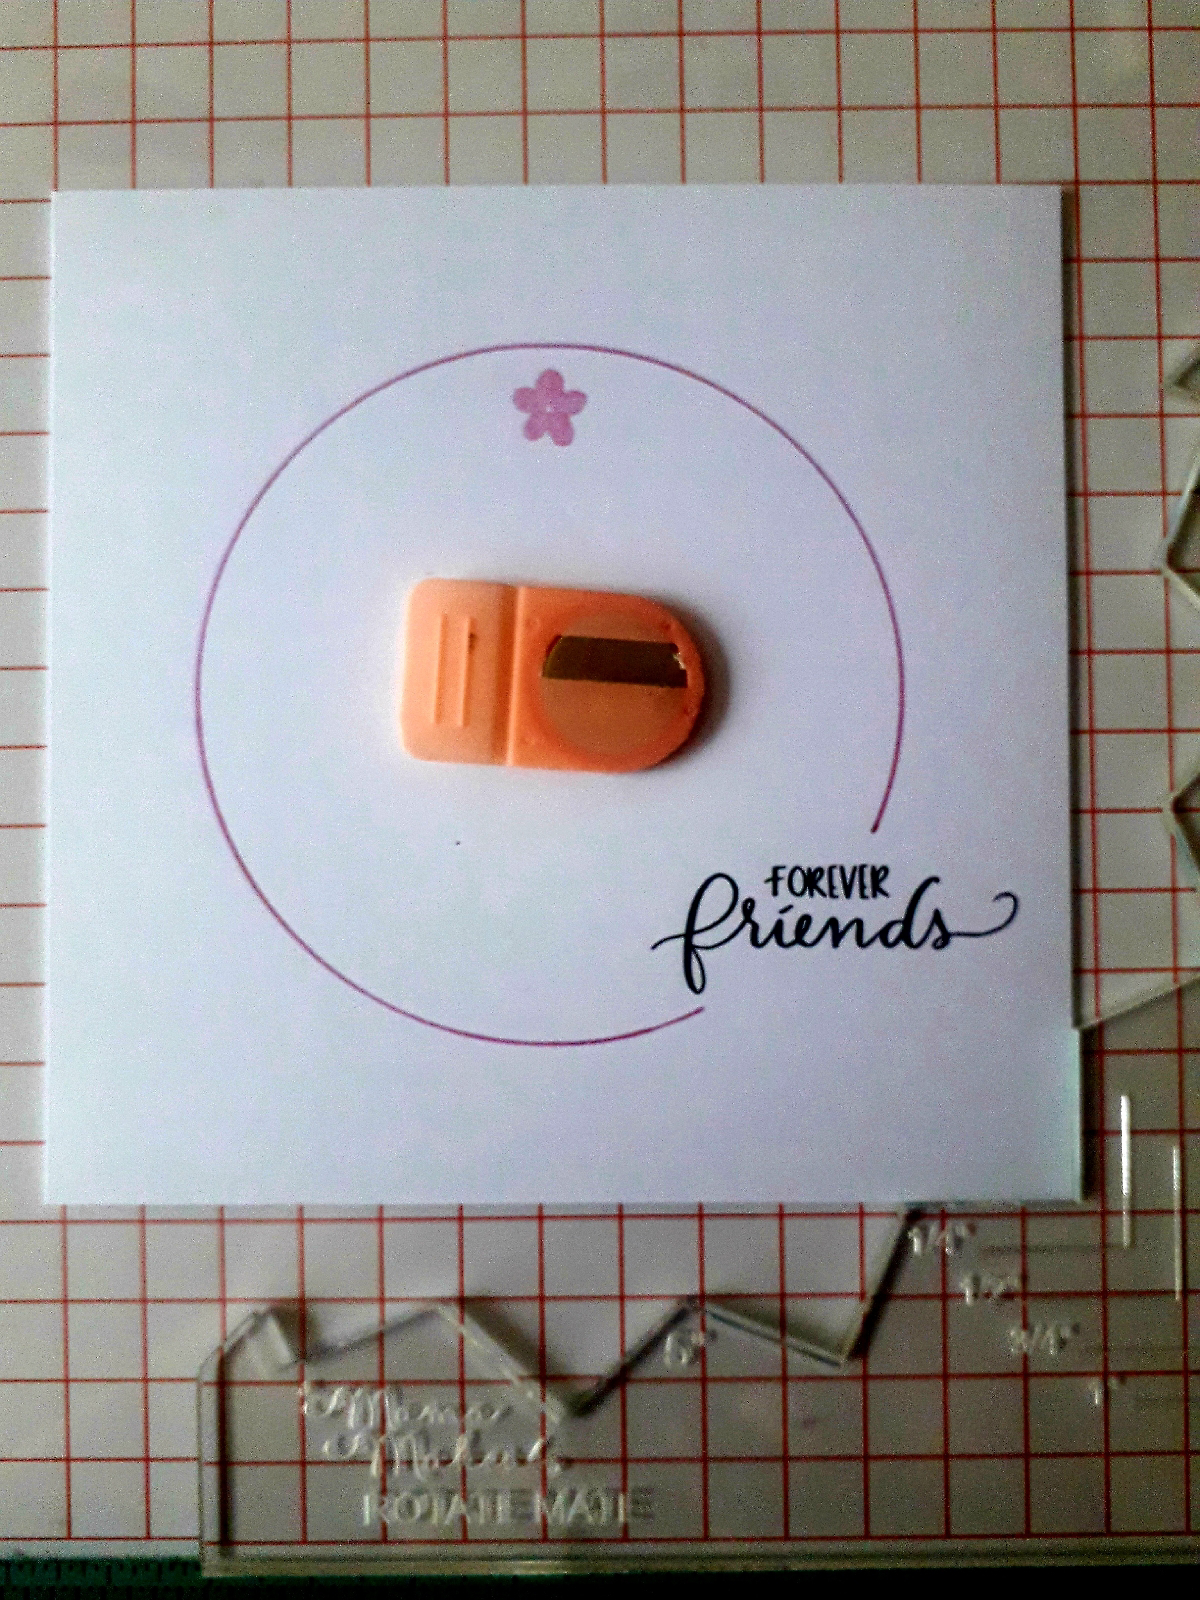
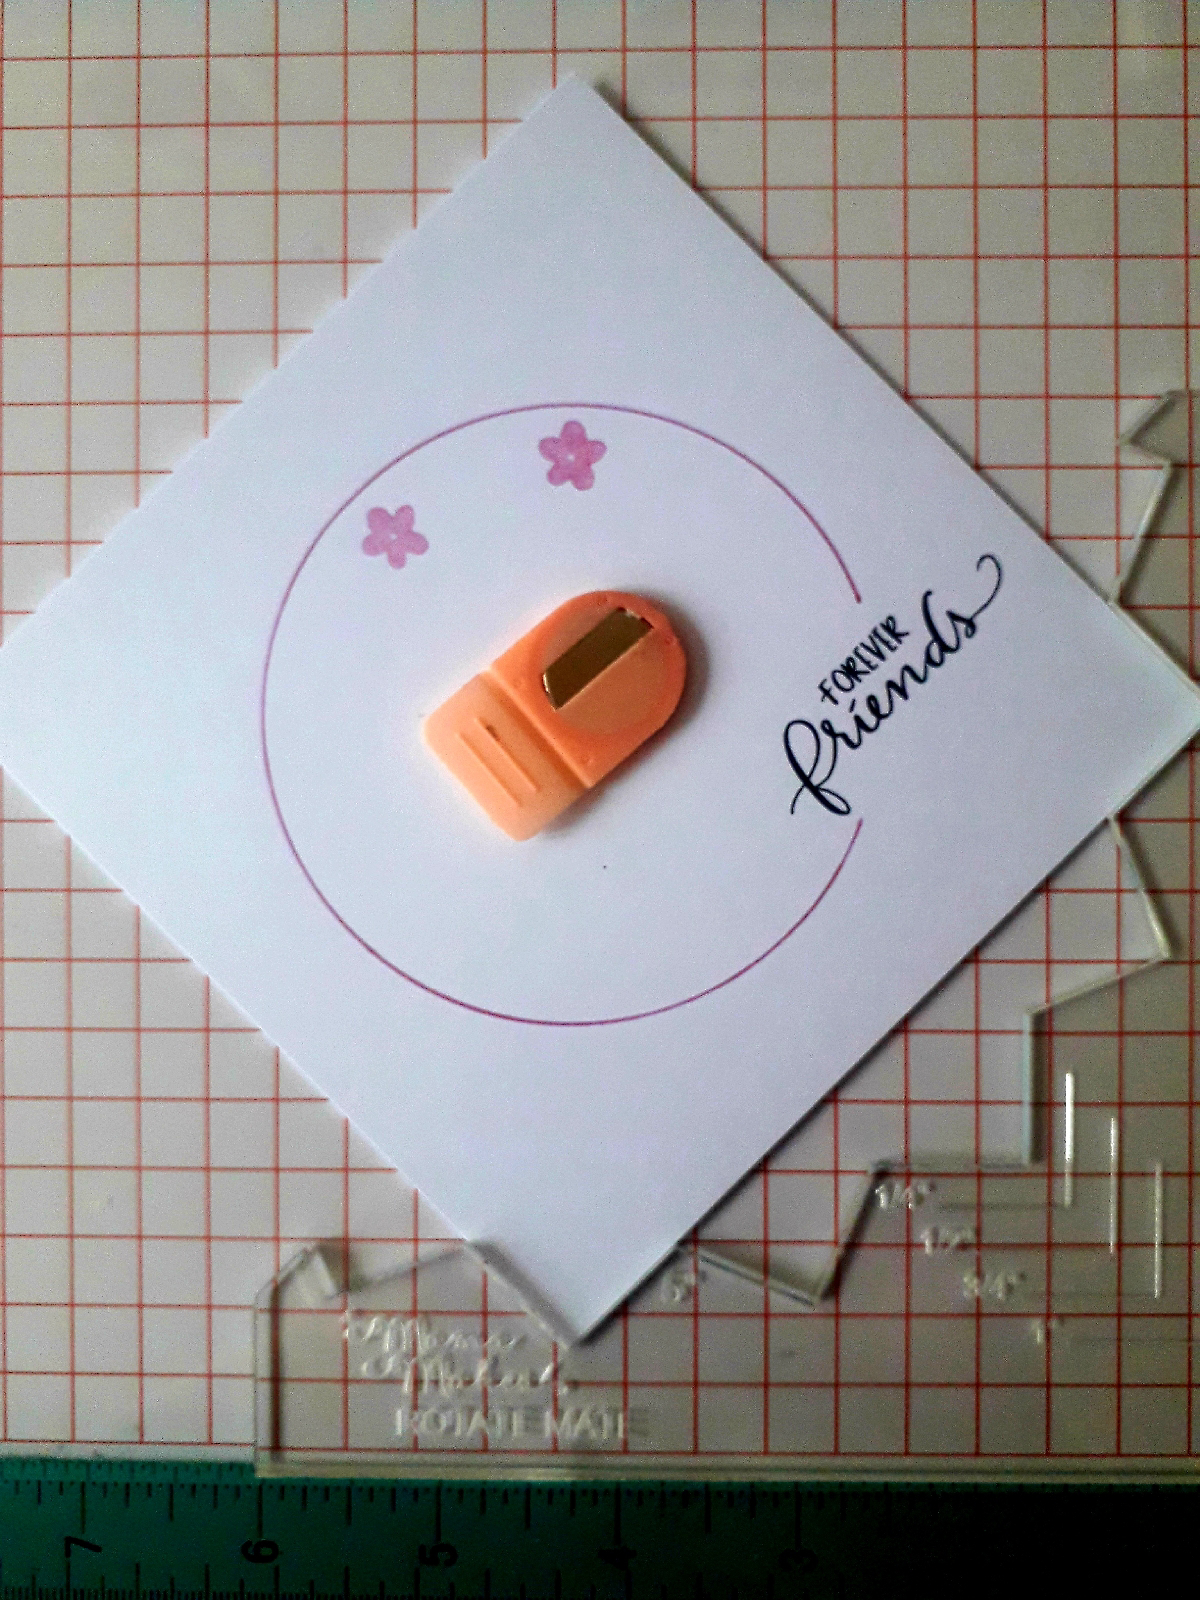
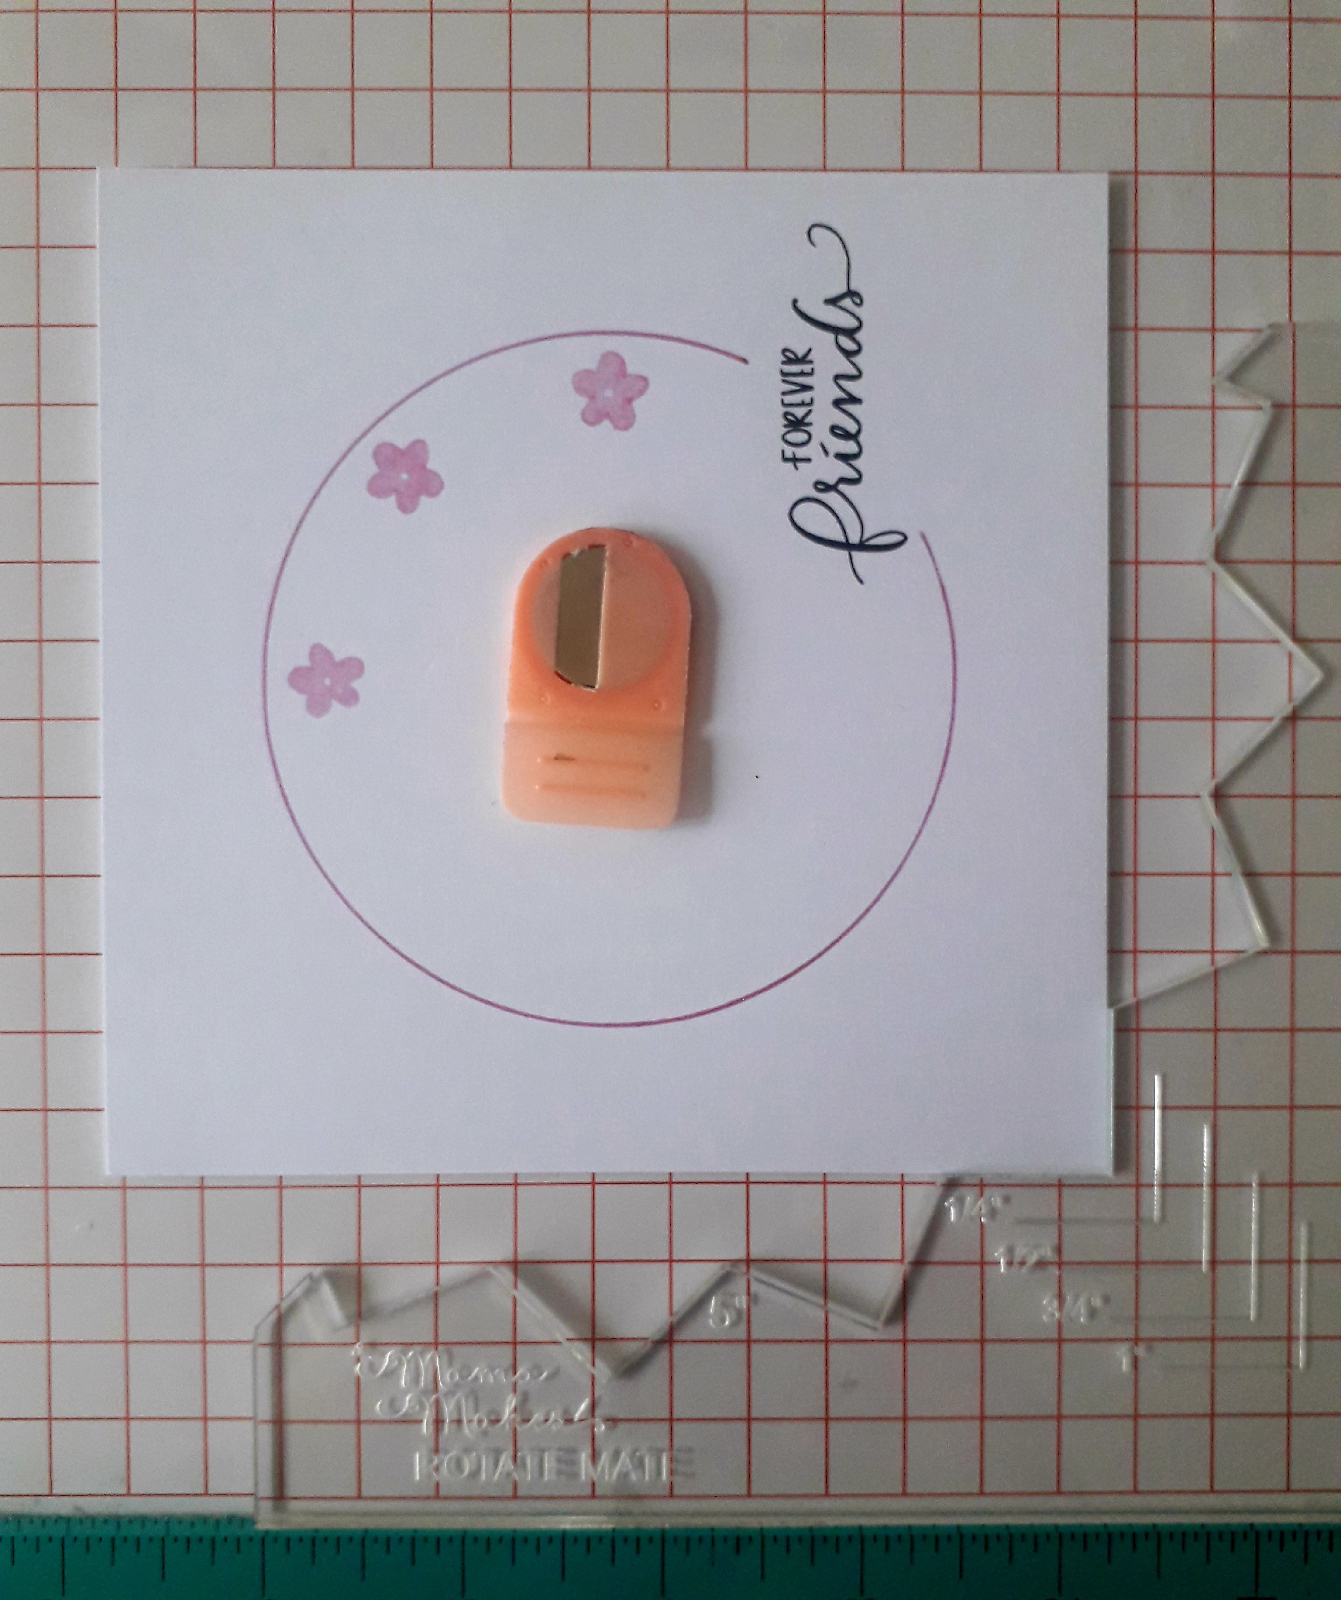
Then I stamped the crosses and circles stamp from the same stamp set using Versafine Clair strawberry. 
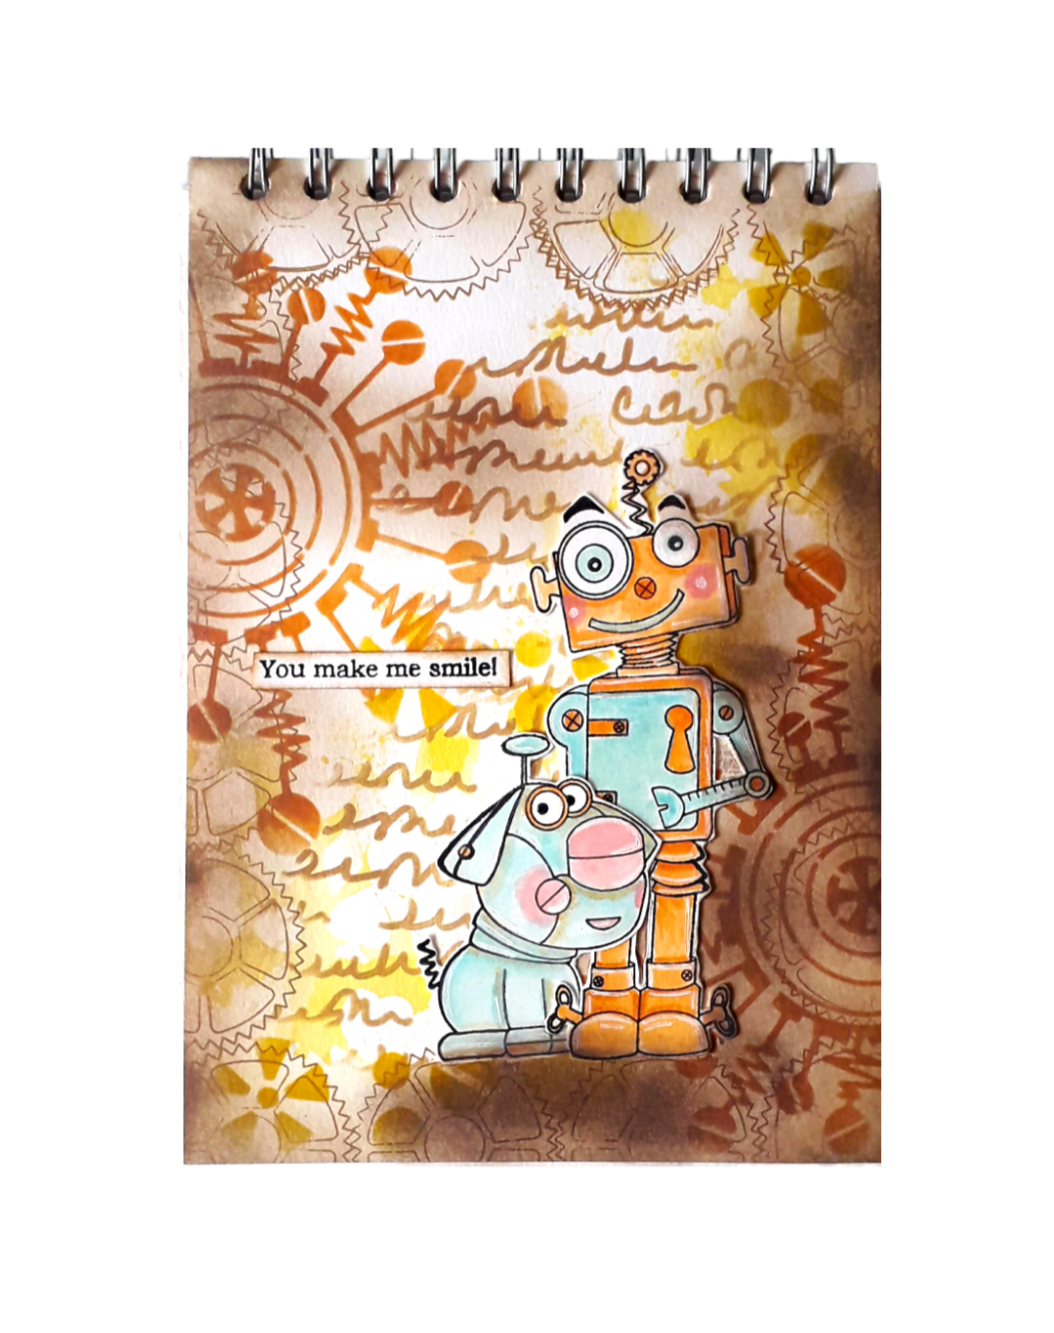
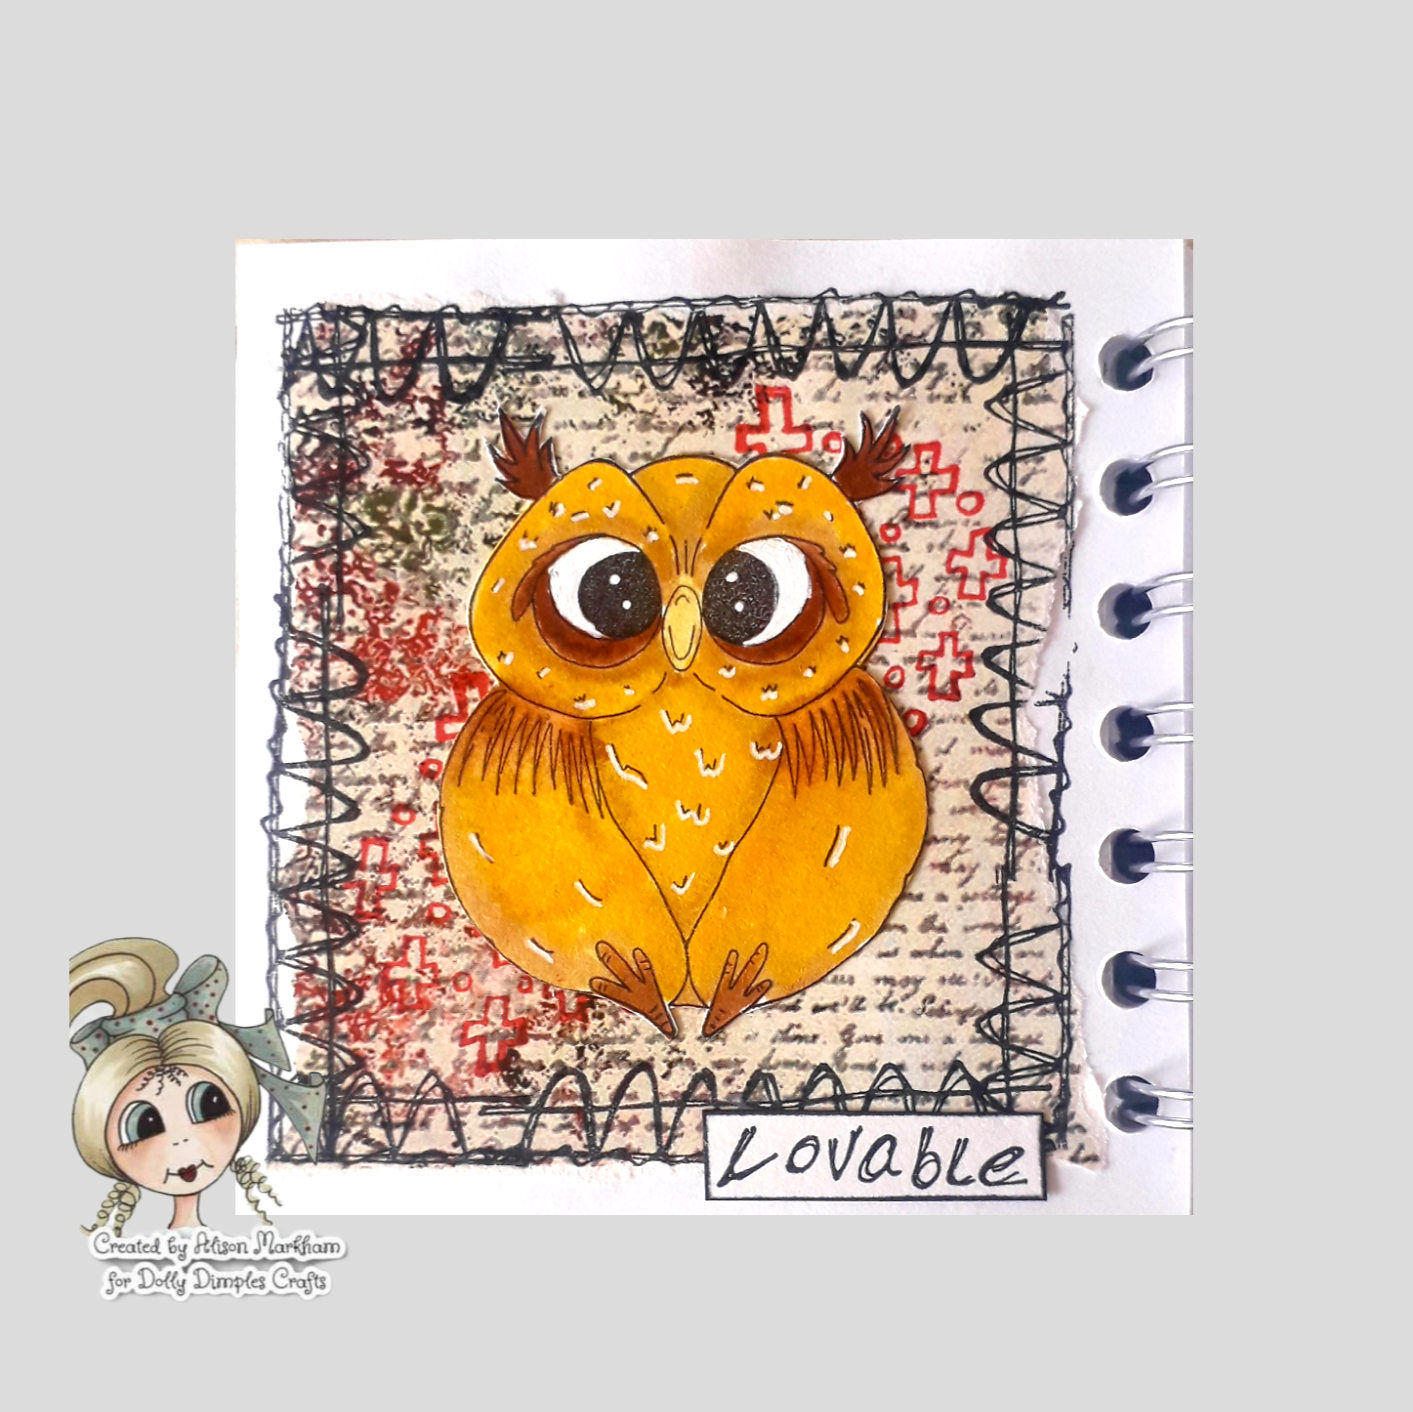
On seperate card, I stamped Theodore, from the Dolly Tots Ellie and Theodore stamp set, using Versafine Clair nocturne. I coloured him with my watercolour pens and a damp paintbrush. I added white highlights with a gel pen, then cut him out.

Next I stamped a sentiment from the Dolly Tots Accessories 2 stamp set. I cut it out and edged it with a black pen.

Finally I glued Theodore and the sentiment to the background.
Products used:
4 x 4 inch Pink Pig Art Journal
Versafine Clair - Nocturne, Strawberry
Watercolour pens
Paintbrush 

I hope you have enjoyed looking.
Alison 

Monday 22 July 2024

Uses for Versafine Clair ink pads

Hi everyone, today I'm sharing some information and uses of Versafine Clair ink pads.

Versafine Clair is a fast drying oil based ink, which is waterproof, fade resistant and light fast. It is perfect for fine detailed stamping, but is also suitable for silhouette stamps. It can also be used with embossing powder.
However, it is not only a great ink for stamping, it will also blend to create backgrounds and can be used through stencils. There are 24 colours in the range.
Below is a step by step guide to creating an art journal page using only Versafine Clair ink and watercolour paints. 

To begin, I blended charming pink and warm breeze ink over the page. I have found that foam blenders are the best for this. The inks don't blend as smoothly as other ink, but for art journaling this just adds more texture to the background.

Next I blended purple delight through the numbers inkable tag from set 1.
As soon as you have finished wash the inkable as the ink will stain it, although even if it does dry it won't reactivate as it is waterproof. You can not spritz with water and transfer the ink to the page like distress inks.

Next I blended warm breeze through the Moroccan tile inkabke tag from set 1 to add more layers.

Then I used purple delight to stamp one of the coffee stains and the numbers from the coffee stain stamp set. I also stamped the splats, from the asemic splats stamp set, using the twilight ink pad.


Next I added some asemic writing, using the stamp with twilight ink.

Next I used the twilight ink to stamp the film strip (unfortunately this set is now discontinued). I had to extend this by stamping half of it a second time.

I then added stamps from the journaling art elements 3 stamp set using puple delight and warm breeze ink.  I stamped the large numbers using charming pink ink.

On seperate card I used twilight ink to stamp my images and sentiment. I then watercoloured the bird and flowers. Once they were dry I cut them all out.

Finally I glued everything to the page using distress collage medium. 

Products used:
Versafine Clair ink pads - charming pink, purple delight, warm breeze, twilight
Bee Crafty Art Stamps - coffee stains, textures, film strip and circles, journal art elements 3, journaling essentials 2
Bee Crafty Doodle Art  stamps - rainbow birds, dandedaisy
Watercolour paints

Thank you for taking a look and I hope it's helped you to know that versafine clair is quite a versatile ink pad.
Alison 

Sunday 21 July 2024

Mama Makes Rotate Mate and Circle Attachment

Hi everyone, today I'm sharing a card made using Mama Makes Rotate Mate and Circle Attachment with the Floral Arrangement stamp set.

To begin, I placed a 5 inch square puece of card, the rotate mate and the largest part of the circle attatchment into my stamping platform.
Next I used a pink pen to draw around the inside of the circle, leaving the pointed area blank.
I then removed the circle attachment and stamped a sentiment in the gap in the drawn circle using versafine clair nocturne ink.
Using the drawn circle as a guide, I placed the small five petal flower inside it at 12 o'clock. I used versafine clair baby pink to stamp it.

I then turned the card two notches anti-clockwise and stamped the flower again using the same ink.

Continue moving two notches and stamping the flower, missing the one where the sentiment is. 

Return the card to the original starting position, and using the same fliwer stamp but with versafine clair charming pink, stamp it outside the drawn circle but in the gap between the first flowers.
I returned the card back to its original position. I then chose one of the foliage stamps and placed it across the line between the two flowers.

I stamped the foliage stamp using versafine clair verdant ink. I rotated the card two notches each time.

After returning the card to its original start position I stamped the three small dots using versafine clair purple delight in every notch around the circle.

I then placed the three dot stamp near the bottom of the green sprig and stamped it every two notches using the purple ink.

Next I returned the circle attachment to the rotate mate and added in the second circle. I drew around this, missing the flowers using the same pink pen.

Then, using the ink that was already on my pink harmony tool I added a small border around my topper.
Finally I glued the topper to a six inch square card blank.
Products used:
Stamping platform
Versafine Clair - baby pink, charming pink, verdant, purple delight

Thank you for taking a look. 
Alison 

Sunday 14 July 2024

A Bot's Best Friend

Hi everyone, today I'm sharing a step by step guide to creating this art journal page using Julia McNeill's stamps and stencils.
To begin I had a page in my art journal which I had used to clean the sprinkle suite stencil.

On this page,  I blended rusty hinge distress oxide through the electric spiral stencil and brushed corduroy distress oxide through the random script stencil.

Next I added a few areas of the circles, cogs and rivet stencil using mustard seed distress oxide. 
Next, very lightly blend scorched timber distress oxide around the edges of the page, taking some towards the middle in some areas.
I then stamped the robot and dog , from the A Bot's Best Friend stamp set, using versafine clair fallen leaves. I coloured them using salvaged petina, rusty hinge and  victorian velvet distress oxide and a white gel pen. I then cut them out.
Before adding the characters to the page, I stamped half of the cog, from the stamp set, around the edge of the page to give a bit of a border.
Next, I grounded the robots by blending scorched timber under where they are standing. I also took the scorch timber up and around the right of the characters to create a shadow.
Finally I added one of the sentiments from the stamp set, which I stamped with versafine clair fallen leaves, then cut out.
Products used 
Random Script stencil 
Circles, Cogs and Rivets stencil
Distress Oxide ink pads - mustard seed, rusty hinge, brushed corduroy, scorched timber, salvaged petina, victorian velvet 
Versafine Clair - fallen leaves

Thank you for taking a look. 
Alison 

Sunday 7 July 2024

Mama Makes Rotate Mate and Slimline Attachment

Hi everyone,  today I'm sharing a card made using the Rotate Mate and Slimline Attachment from Mama Makes.
To begin cut a piece of card to 11 x 7 cm then place the rotate mate, slimline attachment and the card into a stamping platform. Go round the inside of the attachment with a gold gelly roll pen.

Begin by placing the double bauble stamp, from the Christmas Bits stamp set, in the top right corner and stamp with versafine clair nocturne ink.

Next place the single bauble directly below the double one and stamp using the same ink.

Continue alternating the stamps until you get to the bottom of the attachment.

Next stamp the Merry Christmas sentiment from the Festive Wreath Builder stamp set centrally. 

Remove the card from the stamping platform. Colour the baubles using gelly roll glitter pens. Add a second border ensuring this line touches the strings of the baubles.
Add random red dots around the border.
Edge the topper with lumberjack plaid distress oxide and glue to a DL card blank.

Products used:
Stamping platform
Versafine Clair Nocturne 
Lumberjack Plaid distress oxide 
Glitter gelly roll pens

Thank for taking a look. This is just one way to use this attachment, look out for other samples in the Mama's Makers Facebook group. 

Magic Tree Towertown

Hi everyone, today I'm sharing an art journal page created using Art Inspirations Brejanzart Magic Tree Towertown stamp set, with other ...