Monday 25 April 2022

Cleverprints Brave Rose

Hello everyone, today I'm sharing an art journal page created using Cleverprints Brave Rose stamp set.
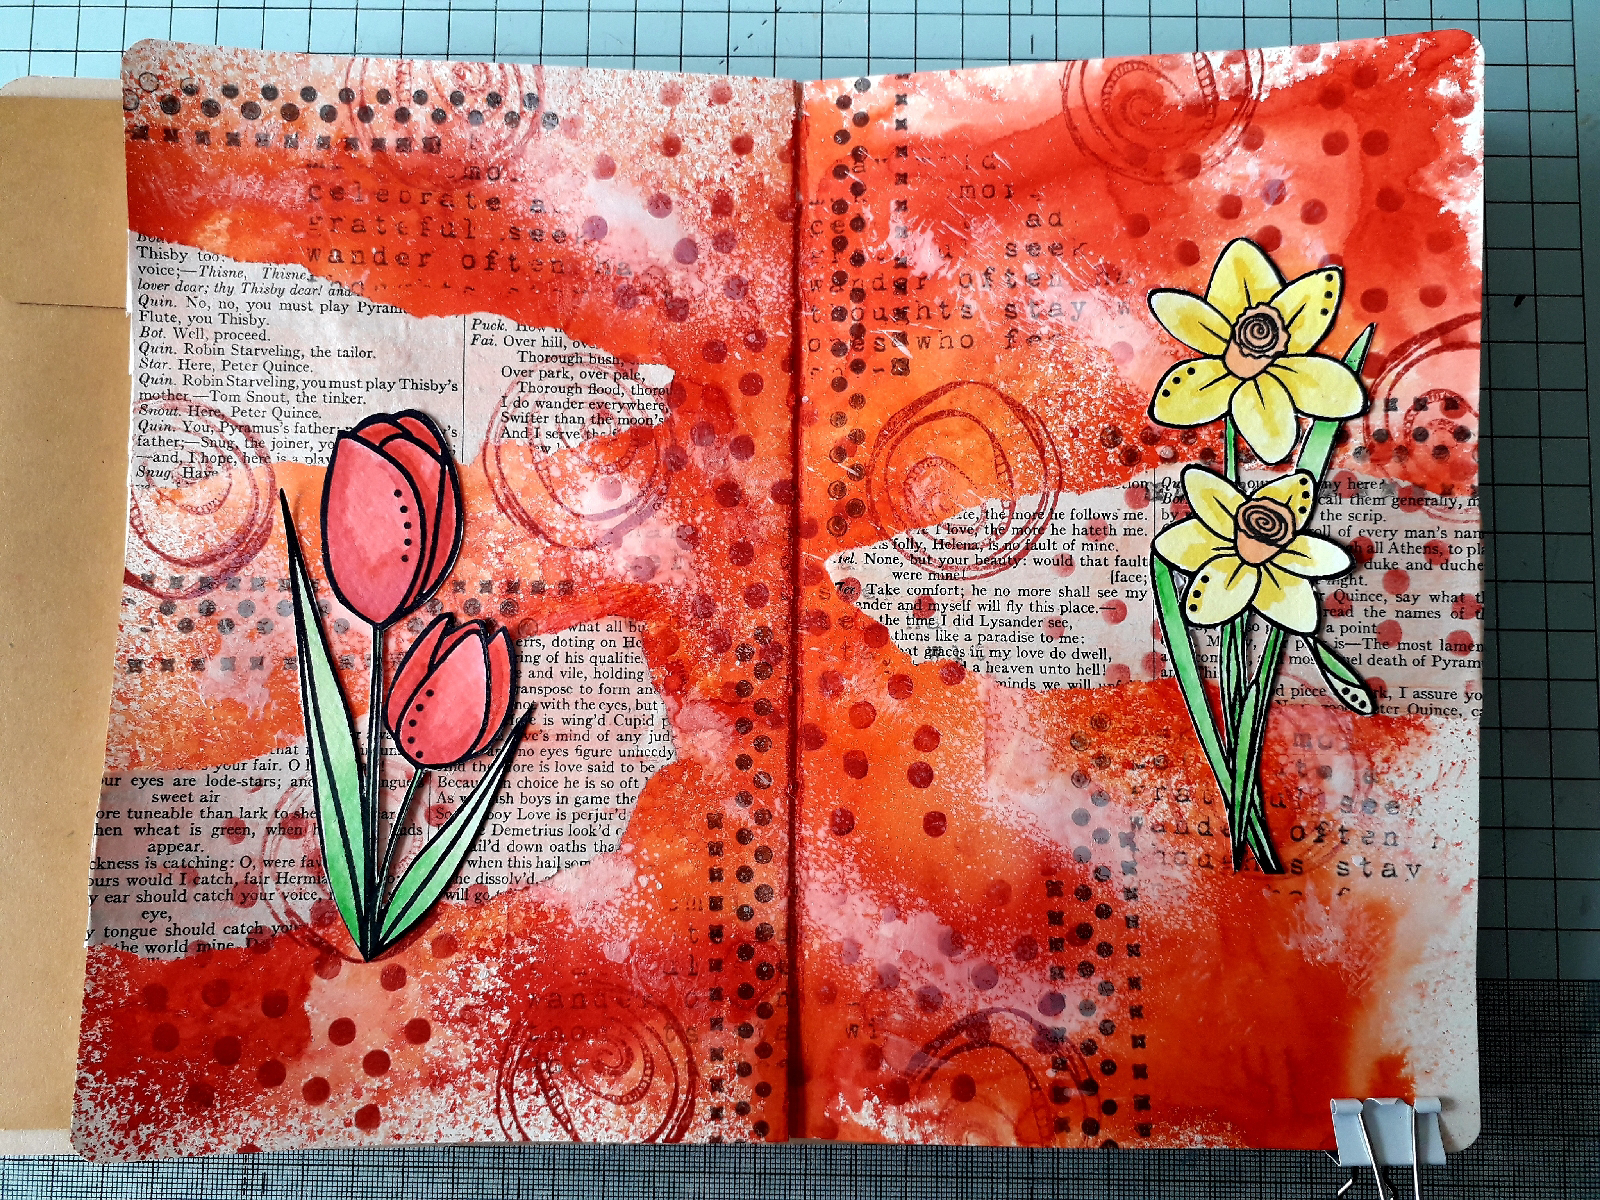
Smoosh twisted citron distress oxide onto a piece of acetate and spritz lightly with water. Touch the inky acetate over the page. Dry with a heat tool. Repeat with candied apple distrsss oxide.
Using the border from the stamp set, with candied apple distress oxide add three horizontal images across the page and two vertically. Using the scribbled words from textures stamp set two, add more detail using twisted citron distress oxide. Arrange the double and single paint splatz on an acrylic block and using pumice stone distress ink, add more detail to the background.

On a seperate piece of card and also on the page stamp the rose using versafine clair ink. 

Colour (I used Karin Brushmarkers and a waterbrush), then cut out and glue to the page. Stamp the sentiment directly onto the page, using Versafine Clair nocturne. Add white highlights using a gel pen.

Products used:
Cleverprints stamps: Brave Rose and Textures 2
Distress Oxide Ink pads: Twisted Citron and Candied Apple
Distress Ink: Pumice Stone
Karin Brushmarkers Pro

Sunday 24 April 2022

Bee Crafty - Nibs and Inkwell

Hi everyone, today I'm sharing a page in my small white Dina Wakely Media journal.

Begin by smooshing salty ocean distress oxide onto a piece of acetate. Spritz lightly with water, then dab on to a blank page. Dry thoroughly.

Repeat with Villainous Potion and Candied Apple distress oxide. Dry between colours.

Tear a length of tape off the formulas and graphs washi. Tear this strip in half and apply vertically to the page with the two straight edges touching. Use collage medium to stick it down, so it remains in place.

Using Versafine Clair nocturne ink stamp the distressed dots border horizontally across the middle of the page.

Using the ledger stamp with black ink and your fingers, rather than an acryluc blick, add it centrally on the page. Don't over inkit, as it needs to fade into the background and doesn't need to be a clear print. Then without reinking stamp it in the top left and bottom right corner.

On a seperate piece of card stamp the nibs and inkwell using black ink. Cut them out.

Glue them across the centre of the page. Use a ruler to keep them steaight.

Stamp your chosen sentiment. Cut out and glue to the page.

Products used:
Backgrounds Textures and Borders - Texture Borders stamp set
Art Stamps - Ledger, Inkwell and Nibs stamp set
Wordage - Small Words 1
Distress Oxide - Salty Ocean and Candied Apple 
Versafine Clair- Nocturne
Piece of acetate

Thank you so much for taking a look at my post
Alison

Monday 18 April 2022

Shady Designs Hanging Around

Hi everyone. Today I'm sharing an art journal page created using stamps from Shady Designs by Lou Sims.
Begin by stamping the Hanging Around main stamp twice on your page using a waterproof black ink. 
Using stamps from the Textures 1 and 2 stamp sets, add more detail to the background using the same black ink. 

Add more detail by using worker stamps from the Painted mixings stamp set. Leave to allow the ink to fully dry.

Blend Saltwater Taffy and Peacock Feathers distress ink over the page. Leave to dry.

Colour the images with Intense pencil crayons and a damp paintbrush.
Stamp sentiment of your choice in the top right part of the page. Use a white Posca pen to add splatz to the page.
Products used:
Shady Designs by Louise Sims - Hanging Around, Textures 1 and 2, Painted Mixings, Patterned Parade (sentiment)
Distress Ink: Saltwater Taffy and Peacock Feathers
Versafine Clair: Nocturne
Inktense pencil crayons

Friday 15 April 2022

Double page journal spread

Hi everyone, today I'm sharing a double page journal spread created using products from Mama Makes.
Spritz a double page with tangarine dream and fiery sunset Dylusions ink spray. Spritz with water. Mop up any pools of ink with kitchen towel. Dry with a heat tool. Spritz with white Deco Art media shimmer mister. Leave to dry.

Add three pieces of old book page.

Add more text using the typed text stamp and Versafine Clair morning mist ink. Add more texture to the background using the funky borders stamp set with morning mist ink. Use the party time circles stencil with fired brick distress ink to add more detail. . 


Then use the same ink with the spiral stamp from the A6 strokes and swirls stamp set to add more texture to the background.

On a seperate piece of card stamp the tulips and daffodils from Natalie's Florals using VersafineClair nocturne ink. Don't worry about stamping the frame. Colour the flowerscwith watercolour markers and a damp paintbrush. Cut out.

Glue the flowers to the pages. 

Stamp a sentiment on each page and the word bloom five times over the two pages.

Products used:
Old book page
Dylusions Ink Spray: Fiery sunset and tangarine dream
Deco Art Media shimmer mister white
Mama Makes stamp sets: Typed script; Funky borders; Textured circles - strokes and swirls A6; Natalie's florals - tulips and daffodils; Blooms words.
Versafine Clair: Nocturne and Morning mist
Distress Ink: Fired brick

Saturday 9 April 2022

Cleverprint Under the Sea

Hi everyone today I'm sharing some inspiration using the Jellyfish stamp set from Cleverprints Under the Sea collection.
Take a piece of mixed media card and place it in a stamp platform. Ink the top part of the  jellyfish stamp with Villainous Potion distress oxide and the tentacles with Picked Raspberry distress oxide. Stamp onto the card and spritz with water. Leave to dry naturally. Do not take it out of the stamp platform.

Restamp the jellyfish and a sentiment using Versafine Clair Fantasia ink.

Colour the spots with brushmarkers in lilac and cerise. Cut out the jellyfish, then add glossy accents to the larger ones. Add wink of stella to the tentacles to give them sparkle. Leave to completely dry. 

Choose a background from the paper pack. I used one of the A5 pieces, so I cut the white edges off and inked the cut edges with the Versafine Clair Fantasia. I glued this to an A5 card blank.

Glue the jellyfish to the card at an angle. Only add glue to the top part, this allows the tentacles to appear like they are moving. Cut out the sentiment and ink the edges in the same coloured ink as the main piece. Glue to the card.
Products used:
Under The Sea - Jellyfish stamp set
Under The Sea - Backing paper pack
Distress Oxide - Picked raspberry and Villainous Potion 
Versafine Clair - Fantasia
Wink of Stella pen
Karin brushmarkers - Cerise and Lilac
Glossy accents

Embossing resist tag

Hi everyone,  today I'm sharing a tag which I have created using the embossing resist technique. I have also used one of Bee Crafty'...