Friday, 31 January 2025

Dream Weaver

Hi everyone, today I'm sharing a step by step guide to creating this art journal page created using Tracy Easson Dream Weaver Stamps. 
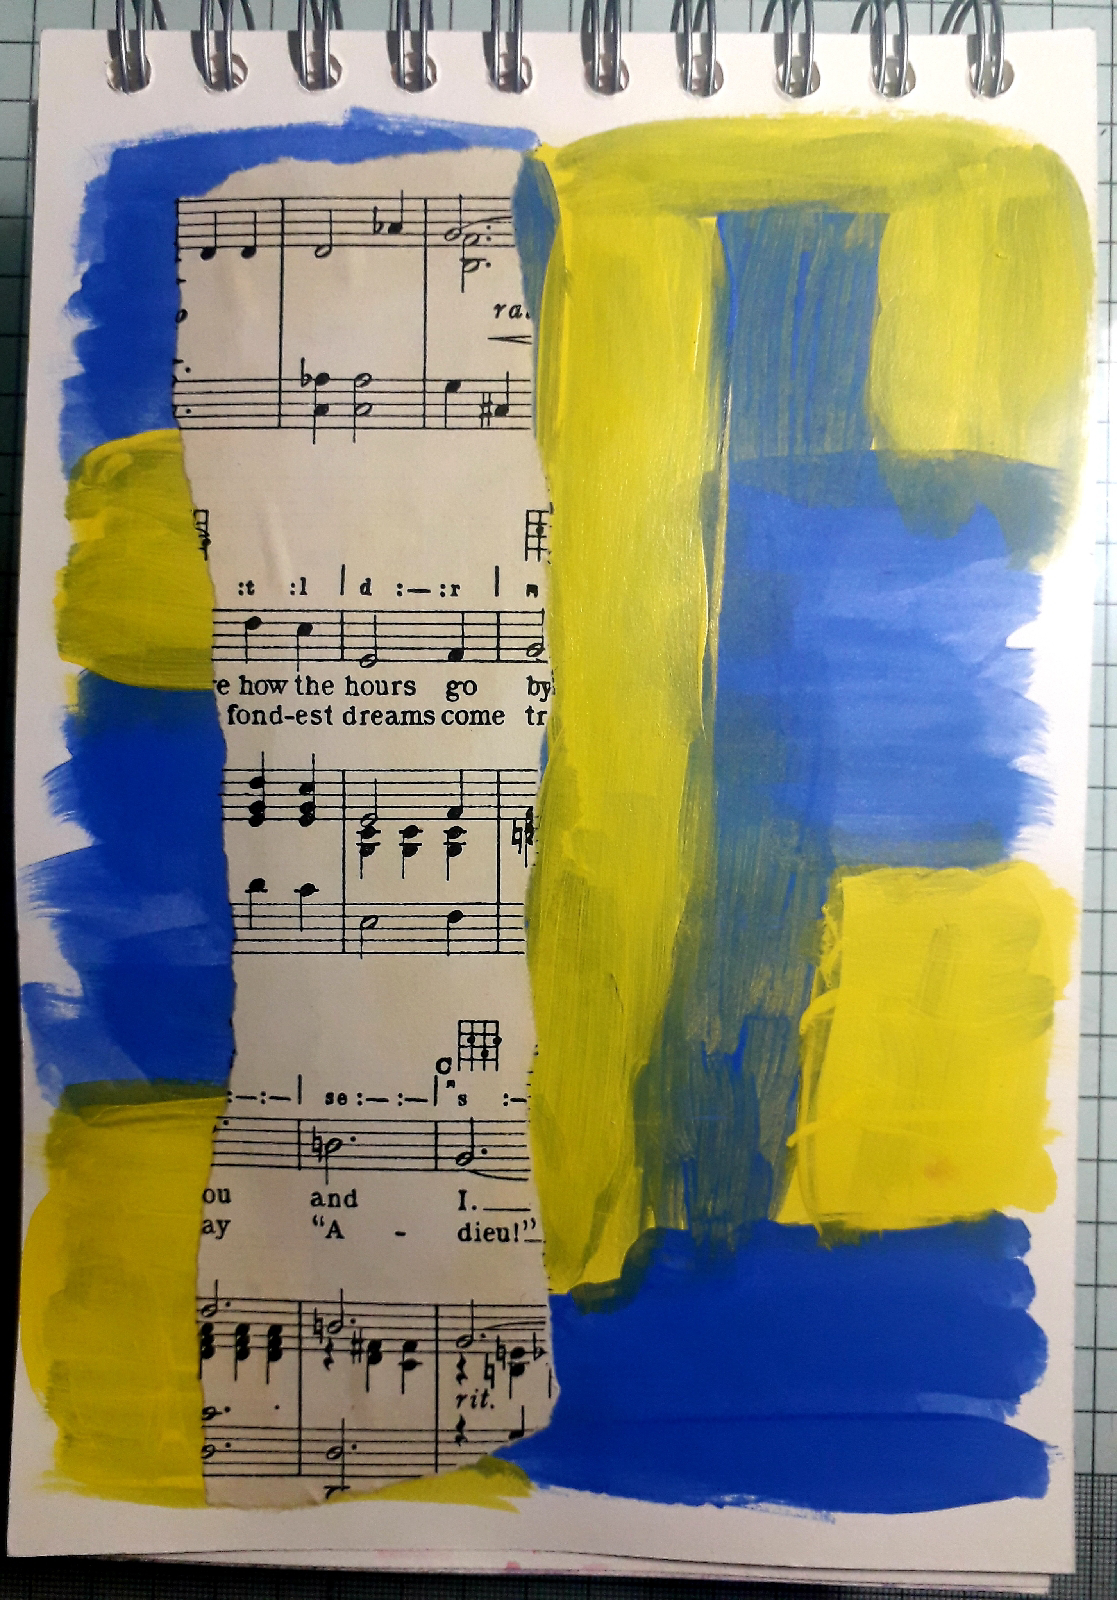
To begin I created a background using Dylusions paint in periwinkle blue and lemon zest.
Next I tore out a strip of old music manuscript and used collage medium to glue it to the page. 
Next I added some strips of washi tape from my stash. 
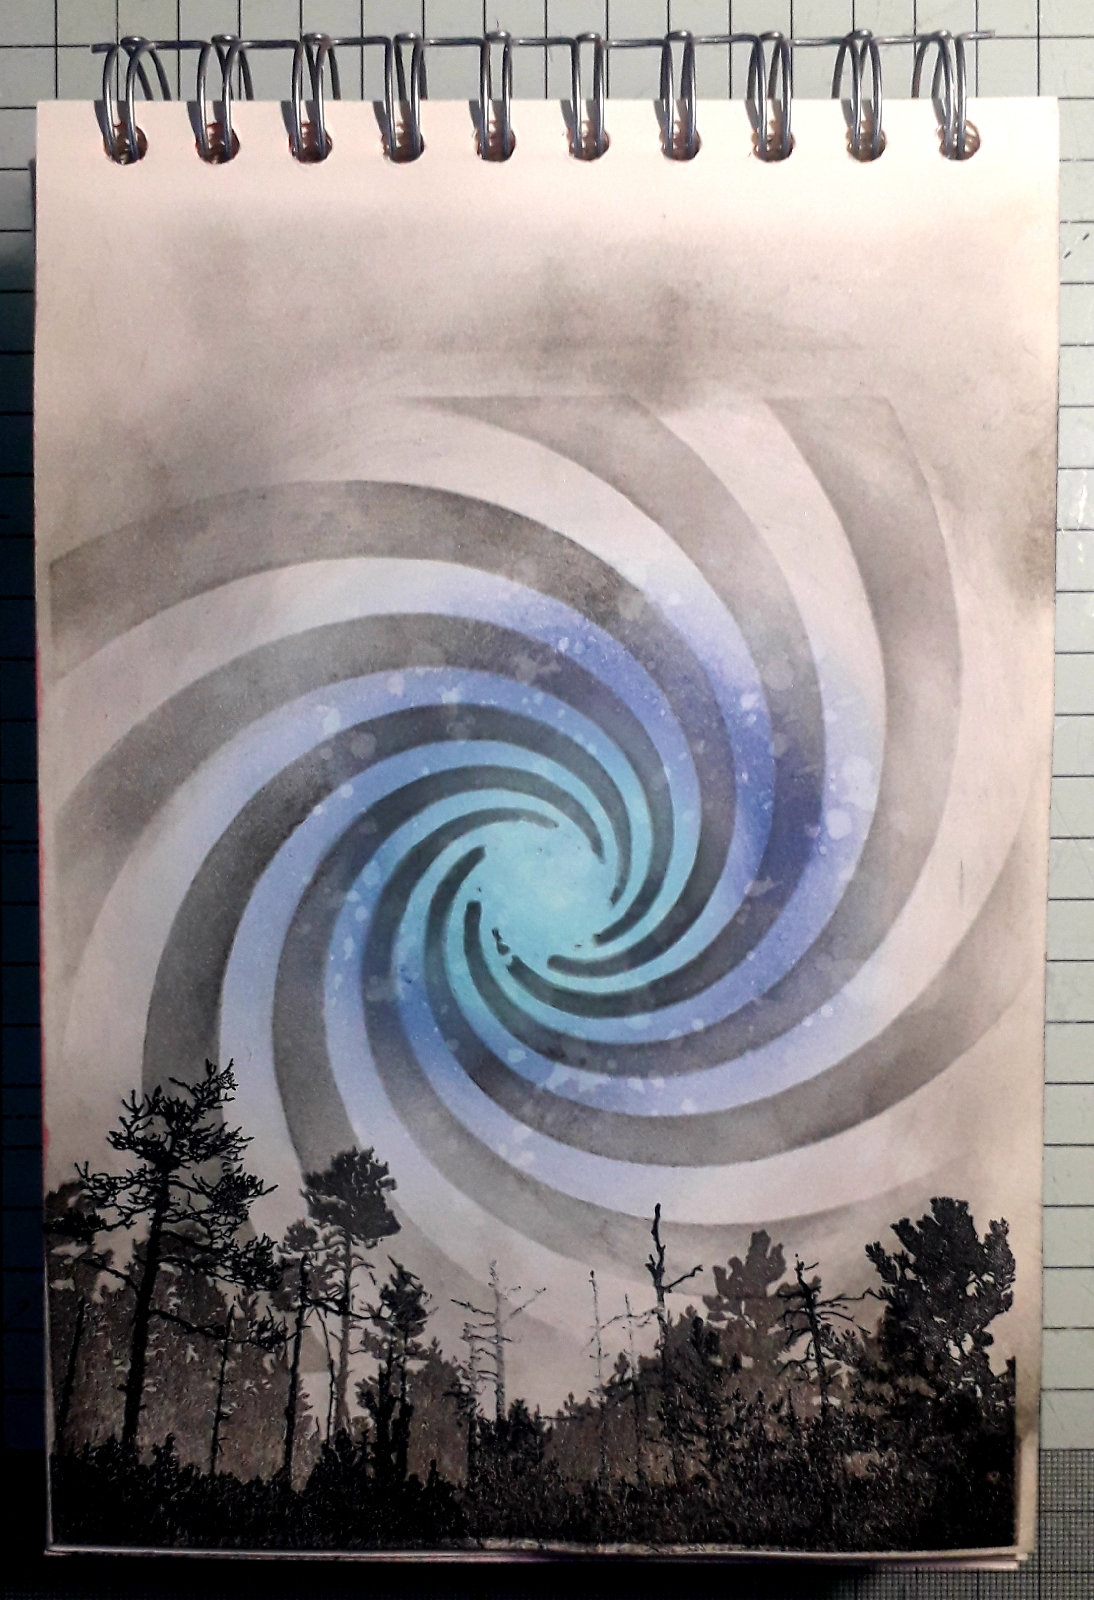
Next I blended ground espresso distress oxide through the broken circles stencil from Dolly Dimples. 
Next I stamped some of the worker stamps, from the Hands of Dreams stamp set, using pinecone Versafine Clair.

Next I stamped the Paint Your Dreams stamp on to Bee Crafty stamping tissue and used a damp paintbrush brush to apply water around the image so that I could gently pull it out of the sheet of tissue. I then used collage medium to adhere it to the page. 
I then coloured the image with my inktense watercolour pencils and a waterbrush. 
To enhance the colours I added gel pens to some parts of the image.
Finally I added a sentiment from Bee Crafty's Wordy Stickers sheet 2.
Products used:
Tracy Easson's Hand of Dreams and Paint Your Dreams
Old music manuscript
Washi tape
Inktense watercolour pencils 
Sakura Gel pens
Distress Collage Medium 
Ground Espresso distress oxide 
Dylusions paint  - periwinkle blue, lemon zest

Thank you for taking a look.
Alison 

Friday, 24 January 2025

Wild and Free Collection

Hi everyone, I had the pleasure of making some samples for the release of Shady Designs new Wild and Free stamp collection. I am sharing them below.

For my first sample, I used the main image from the Fungi and Flora stamp set. I stamped it onto craft card and heat embossed it with copper embossing powder. I then coloured it using my Castle Arts colouring pencils. I also heat embossed the sentiment from the stamp set.
For my second sample, I stamped the main image and sentiment from the Leafy Loops stamp set using versafine clair nocturne ink onto cream card. I used my Castle Arts colouring pencils to colour it in. I then added shaded lilac distress oxide around the edges of the piece of card and mounted this onto a cream card blank.

My third sample is a set of three altered playing cards. To create these I used both stamp sets in the collection. I created backgrounds on all three cards using the Cracked and Hanging Garden stencils and the Hanging Garden stamp. I then stamped and coloured, using distress watercolour pencils, several of the images. These were collaged onto the cards.

My last sample uses stamps from bith stamp sets. I began by using Bee Crafty's 6" easy frame to apply tumbled glass and bundled sage distress oxide to the piece of card. I then blended hickory smoke distress oxide through the Mushrooms and More stencil. I stamed, using versafine clair nocturne, the wreath, some flowers, fungi and berries onto a separate piece of card and coloured them with pencils. I stamped one of the floral images onto the background piece. After cutting out all the images I used foam tape to adhere them to the card. I stamped the sentiment four times around the edge and mounted this on green card then a card blank.

Products used:

Bee Crafty's 6" Circle Easy Frame.

Thank you for taking a look.
Alison 

Friday, 17 January 2025

Ahead of our time

Hi everyone today I'm sharing an art journal page created using Visible Image's stamps and stencils.
To begin create a background using tumbled glass, faded jeans and hickory smoke distress oxide. Then blend black soot distress oxide through the time tunnel stencil. Splat with water and leave to dry.
Stamp the solid trees, from the Into The Woods stamp set, using morning mist from Versafine Clair. Then stamp the other tree stamp from the set using versafine clair nocturne. 
Stamp the door, from the Ahead of our Time stamp set, using black ink. Colour it using watercolour paints.
When the paint is dry, use the strobe stencil with mustard seed distress oxide to give the impression that the light is shining out of the door.
Next stamp the two people silhouettes, so they look like they fell through the door using black ink.
Add the spiral numberline, using grey ink, over the centre of the vortex.
Finally, add a sentiment from Clarity's WordSticker Collection by Barbara Gray. 

Products used:
Visible Image
Ahead of our Time stamp set

Clarity
Word Sticker Collection by Barbara Gray 

Thank you for taking a look.
Alison 

Friday, 10 January 2025

Ephemera and Stamps Art Journal Page

Hi everyone, today I'm sharing a step by step guide to creating this art journal page using ephemera and stamps from Julia McNeill Crafts. 

To begin, I created a background by smooshing picked raspberry distress oxide onto a piece of acetate. I spritzed this lightly with water, then dabbed the ink onto the page. I then added some picked raspberry distress spritz and left the page to dry.
Next, I stamped the tape measure image using Versafine Clair Nocturne ink.
Then, I stamped the largest stamp, from the Stamplimentals Edition 2 stamp set using Versafine Clair Charming Pink ink. I also added the smaller of the two background stamps, from the Splats and Ladders set, using the same black ink pad.
I added some of the squares, from the Picnic Blanket stencil, using Picked Raspberry distress oxide. 
I, then, added some of the trellis, from the Rose Trellis stencil, using Black Soot distress oxide. 
On seperate card, I stamped the camera, film and bith sentiments from the Oh! Snap stamp set. I coloured the images with distress watercolour pencils. 

I then chose the ephemera I wanted to use from the Pastel Petals Bit Box Bits pack.
Finally, I glued all the ephemera and stamped images to my background. I edged the sentiments with a black pen, just to lift them off the page.
Products used:
JMC Designs Pollen Petals Bit Box Bits 
Stamplimentals Edition 2 and 3 stamp sets
Splats and Ladders stamp set
Oh! Snap stamp set
Picnic Blanket Stencil
Rose Trellis Stencil 
Distress watercolour pencils 
Distress oxide - black soot, picked raspberry 
Distress Spritz - picked raspberry 
Versafine Clair - nocturne, charming pink 

Thank you for taking a look.
Alison 

Friday, 3 January 2025

Smile

Hi everyone, today I'm sharing a step by step guide to creating this card using paints, embossing powders, die cuts and stamps.
To begin, I created a watercolour background using three colours from my Kuretake Gansai Tambi watercolour paints. I painted srips of each colour just under half way across the width of the card. I then spritzed the paint lightly with water and left it to dry naturally.

Next, using Wow embossing ink, I stamped the words stamp from Shady Design by Louise Sims Beautiful Day set. I followed the edge of the paint so that it was not in a staight line down the page. I then added gold embossing powder and heat set.
Next I die cut the leafy branch from black card. The die I used was an older one from Stamps by Me.
I, then, glued this to my background piece. Again, following the edge of the paint.
As I had no gold mirri card, I die cut the sentiment, another older die from Stamps by Me, out of white card. I then pressed this, right dide down, onto the Wow embossing ink pad and then added gold embossing powder to it and finally heat set the powder. 

Finally I glued the background piece to a 5 x 7 inch card blank and added the sentiment.
Products used:
5 x 7 card blank
Piece of card 6.5 x 4.5 inches
Stamps by Me branch die
Stamps by Me Smile die
Kuretake Gansai Tambi watercolour paints 
WOW! Embossing ink pad 

Thank you for taking a look. 
Alison 

Frame by Frame

Hi everyone today I'm sharing a step by step guide to creating this art journal page using products available from Dolly Dimples, Shady ...